Publishing and Automation
Last updated on 2026-03-12 | Edit this page
Estimated time: 60 minutes
Overview
Questions
- How can I publish a website from my repository?
- What are tags and releases?
- How can I automate tasks with GitHub Actions?
Objectives
- Enable GitHub Pages to publish a simple site from a repository
- Create a tag and a release on GitHub
- Explain what GitHub Actions are and how workflows are triggered
- Describe how git and GitHub support FAIR and open-science principles
GitHub Pages
GitHub Pages turns a GitHub repository into a website — for free. It is commonly used for project documentation, personal portfolios, and course materials (like this one!).
The generated website is hosted on GitHub’s web servers and can be accessed via a URL like
-
https://USERNAME.github.io/REPO/, replacingUSERNAMEandREPOrespectively. - e.g. this course’ URL https://dr-eberle-zentrum.github.io/intro-to-git-and-github/.
Note, website and repository content are separately maintained but linked: you edit files in the repository, and GitHub Pages copies and renders them as a website.
The website does only contain the files that are covered by the Pages
configuration. For instance, per default only the README.md
is rendered as a web page, but other files (e.g. about.md)
are not included in the website until you link to them from the
README.md or create an index.html that
includes them. Alternatively, you can configure GitHub Pages to render
all files in a specific folder (e.g. /docs) and/or branch,
but this is not the default. The latter is useful when page generation
involves a build step as is the case for this course, which uses the Carpentries
Sandpaper workflow to generate the website from markdown files in
the repository.
An important note: GitHub Pages only supports static websites — meaning they cannot run server-side code (e.g. Python, PHP). Serving and including client-side JavaScript code from your repository is possible. This makes GitHub Pages ideal for simple project documentation, portfolios, and course materials, but not suitable for dynamic web applications.
But beware, GitHub (Pages) is not a long-term archive. While repositories can be part of GitHub’s archiving program, it is recommended to use a dedicated archive (e.g. Zenodo) for long-term preservation of research outputs. The same holds for websites published with GitHub Pages: they are not guaranteed to be preserved indefinitely, so consider using a web archiving service (e.g. Internet Archive) for important pages.
Enabling GitHub Pages
- Go to your repository on GitHub.
- Click Settings → Pages.
- Under Source, select the branch
(e.g.
main) and folder (/ (root)or/docs). - Click Save.
- After a short build, your site will be available at
https://USERNAME.github.io/REPO/.
Using GitHub Pages URL in Project Description
When using GitHub Pages to serve a well styled documentation or project website, it is typically a good idea to include the URL of the published site in the repository’s description. The easiest way is to use the About section on the right sidebar of the repository’s main page.
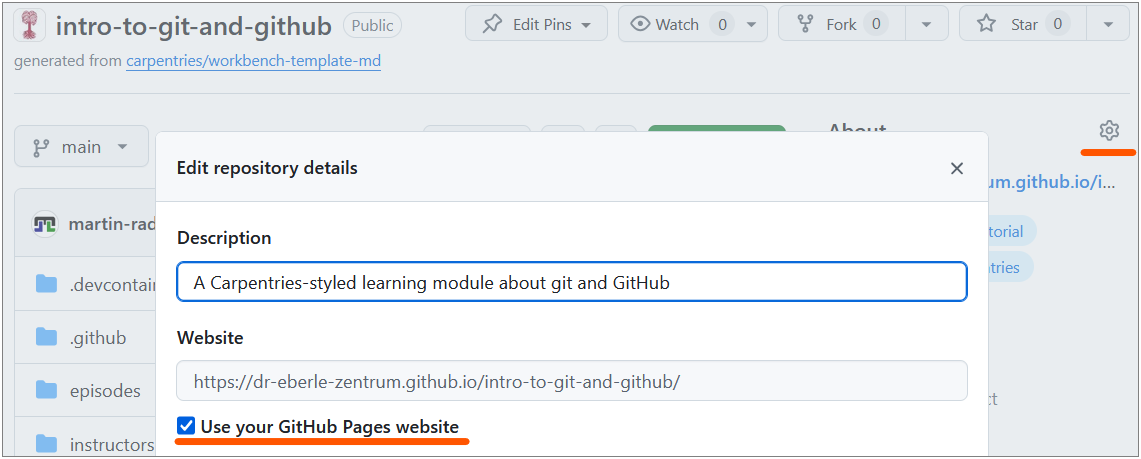
The dialog, shown above, allows you to add a short description of your project and a URL, or most easy, to use the GitHub Pages output URL.
Checking the build process
The build process for GitHub Pages can take a few minutes. If your site doesn’t appear or update immediately, wait a bit and refresh the page. You can also check the build status in the repository’s Actions tab, where you may find logs if there are issues with the build.
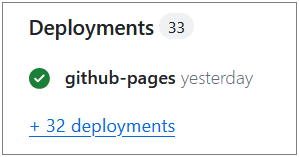
Alternatively, the build status is reported in the Deployments section of the repository’s main page’s right sidebar, where you can also find logs for troubleshooting.
Minimal site from a README
The quickest way to get a Pages site is to write your content in
README.md. GitHub Pages will render it as HTML
automatically. For more control, you can use a static site generator
like Jekyll (GitHub’s default) or create your own HTML files.
GitHub Actions (Introduction)
GitHub Actions let you automate tasks that run
whenever something happens in your repository — for example, when you
push a commit or open a pull request. The introduced GitHub Pages
feature is an example of a GitHub Action that runs on every push to the
main branch to build and deploy the website. You can create
your own custom actions to automate tasks like running tests, checking
code style, or even deploying your project to a server.
What is a workflow?
A workflow is an automated process defined in a YAML
file inside the .github/workflows/ directory of your
repository. (If you have never heard about YAML yet, you might want to
check
out this YAML introduction) Each workflow contains one or more
jobs, and each job contains one or more
steps.
When does a workflow run?
Workflows are triggered by events, such as:
-
push— when commits are pushed to a branch (e.g. GitHub Pages deployment). -
pull_request— when a PR is opened or updated (e.g. to check spelling). -
schedule— on a cron schedule (e.g. nightly). -
workflow_dispatch— manually triggered from the Actions tab on GitHub.
Example: spell-checking with GitHub Actions
A simple spell-check workflow using cspell-action
can catch typos automatically. To this end, you would create a YAML
workflow file like .github/workflows/spellcheck.yml with
the following content:
YAML
# Workflow to enable spell-checking on pull requests to main
---

name: Spell Check

on: # any PRs on main branch
  pull_request:
    branches: [main]

jobs:
  spellcheck: # run the action
    runs-on: ubuntu-latest
    steps:
      - uses: actions/checkout@v5
        with:
          persist-credentials: false
      - uses: streetsidesoftware/cspell-action@v8
This workflow:
- Triggers on every pull request to the
mainbranch. - Checks out the repository code.
- Runs cspell to find spelling errors.
- Reports any issues directly in the pull request, making it easy to fix typos before merging.
To enable the workflow, you only have to commit and
push the workflow file to your repository. As soon as present, GitHub
will automatically run the workflow whenever a pull request is opened or
updated against the main branch, and report the results in
the PR’s checks section.
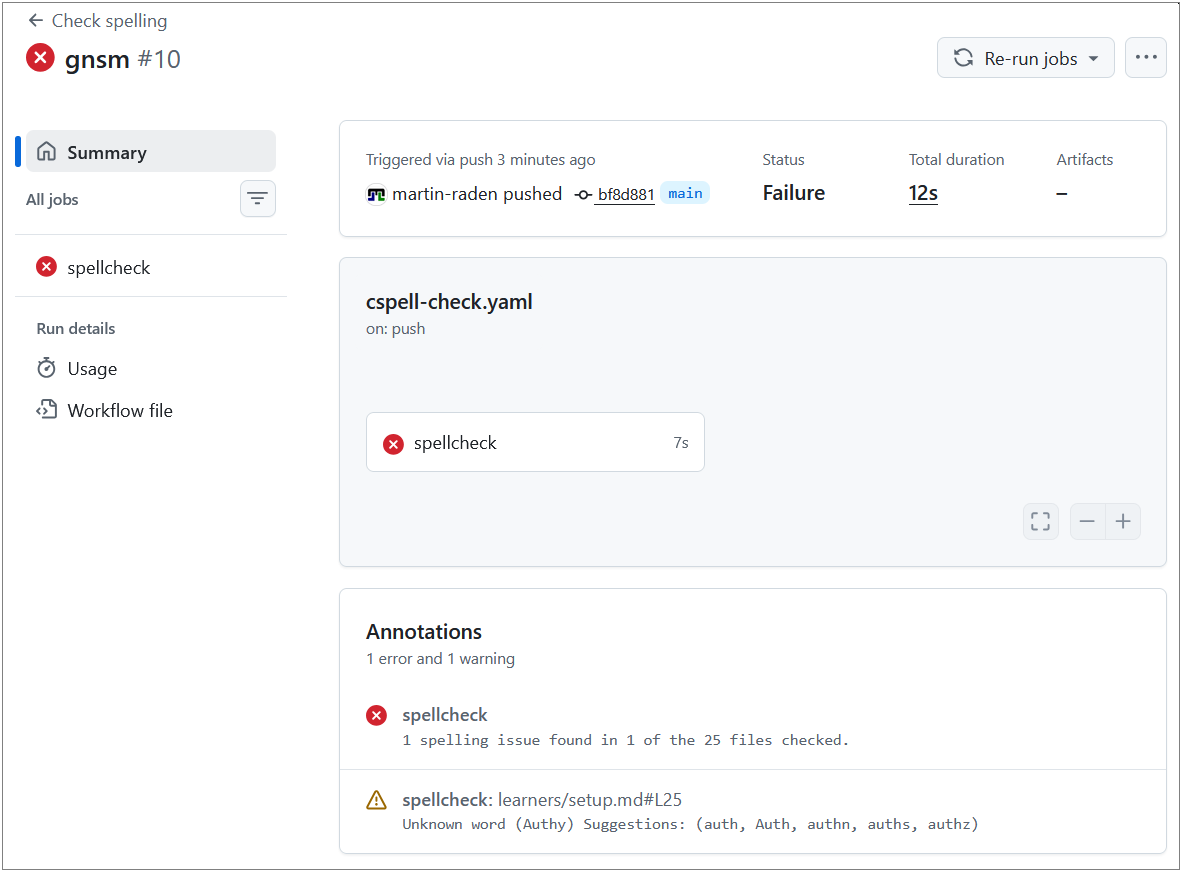
Whether or not a workflow passes or fails is visible in the pull request’s checks section or in the Actions tab of the repository.
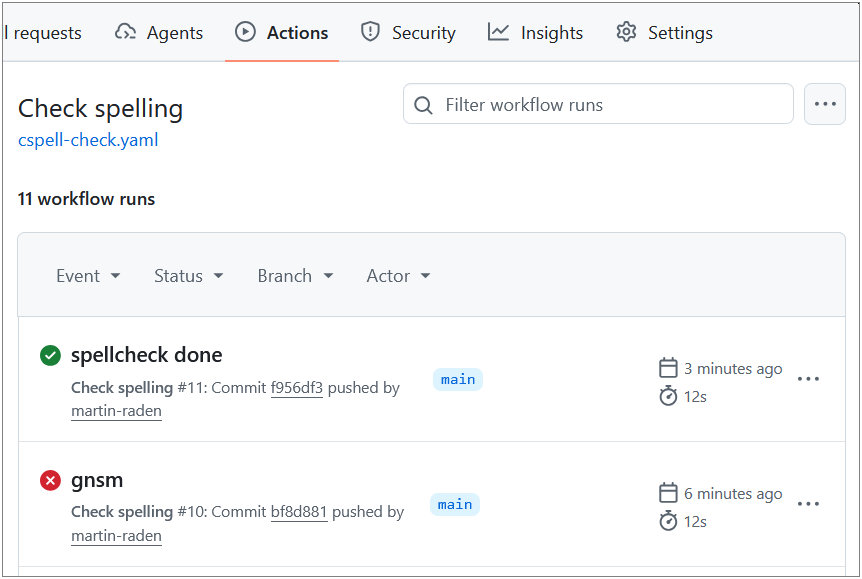
A passing workflow will show a green checkmark, while a failing workflow will show a red cross, along with logs to help you diagnose the issue.
There is a wide variety of pre-built actions available in the GitHub Marketplace that you can use to automate different tasks, such as testing, linting, deployment, and more.
BASH
# Create the workflows directory
mkdir -p .github/workflows

# Create the workflow file
cat > .github/workflows/spellcheck.yml << 'EOF'
name: Spell Check
on:
  pull_request:
    branches: [main]

jobs:
  spellcheck:
    runs-on: ubuntu-latest
    steps:
      - uses: actions/checkout@v4
      - uses: streetsidesoftware/cspell-action@v6
EOF

git add .github/workflows/spellcheck.yml
git commit -m "Add spell-check workflow"
git pushExercise: What Is a Workflow?
In your own words, explain:
- What is a GitHub Actions workflow?
- When does it run?
- Give one example of a useful workflow for your own project.
- A workflow is an automated process defined in a YAML file that tells GitHub what tasks to perform (e.g. run tests, check spelling).
- It runs when a specified event occurs — such as pushing code, opening a pull request, or on a schedule.
- Examples: run a spell checker on every PR, build a website on every
push to
main, run unit tests before merging.
Tags and Releases
Tags
Tagging is a central feature of git that allows you to mark important
points in your project’s history, such as releases or milestones.
Eventually, a tag is a label attached to a specific
commit, typically used to mark version numbers
(e.g. v1.0.0).
Releases
A release is a GitHub feature built on top of tags. It adds:
- Release notes describing what changed.
- Downloadable archives (
.zip,.tar.gz). - Optional binary attachments.
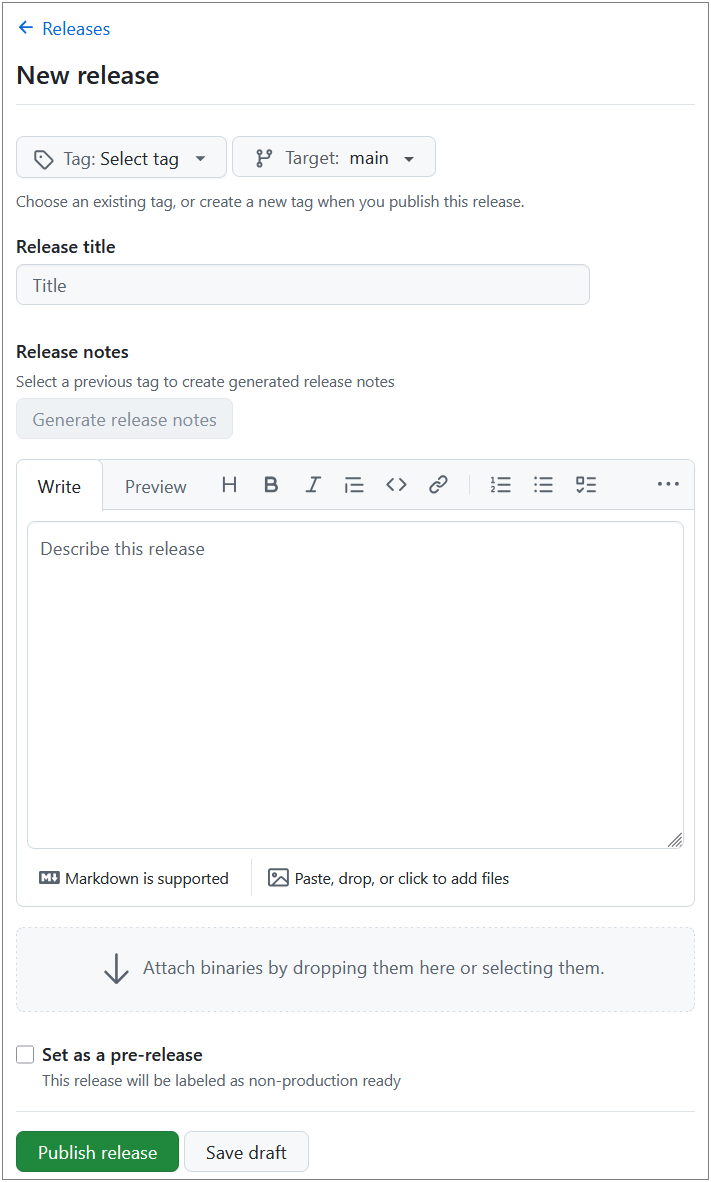
Creating a release on GitHub
- Go to your repository and click Releases (in the right sidebar).
- Click Draft a new release.
- Enter/Choose a tag (e.g.
v1.0.0) and a title. - Write release notes summarising the changes.
- Click Publish release.
In contrast to tags, releases can be enriched with additional information and assets, making them more informative and user-friendly for end-users who want to understand the changes and download specific versions of the project.
A release typically provides a ZIP or tarball archive of the whole repository at the tagged commit, which can be downloaded by users without needing to clone the repository or use git commands. Furthermore, release information can be accessed via respective URLs making it easier to share specific versions of the project with others.
Zenodo Archiving and DOI
Zenodo is a research data repository that integrates with GitHub. By linking your repository to Zenodo, every release automatically gets a DOI (Digital Object Identifier) — making your work citable in academic publications and archived within Zenodo’s long-term preservation system.
Quick setup
- Go to zenodo.org and log in with your GitHub account.
- Enable the repository you want to archive.
- Create a release on GitHub — Zenodo will automatically archive it and assign a DOI.
GitHub for Science
Git and GitHub support several principles that are important in research:
| Principle | How GitHub helps |
|---|---|
| Reproducibility | Every version is tracked; collaborators can reproduce results from any point in time. |
| Transparency | Public repositories let anyone inspect the work. |
| Collaboration | Issues, pull requests, and reviews enable structured teamwork. |
| Archiving | Zenodo integration provides long-term preservation with DOIs. |
| FAIR data | Repositories can be Findable, Accessible, Interoperable, and Reusable when properly documented. |
Limitations
- GitHub is not a long-term archive by itself — use Zenodo or a discipline-specific repository for preservation.
- Large binary files (datasets, images) are not handled well by git. Consider Git LFS for large files.
- Private repositories limit transparency; consider making repos public when the work is published.
Alternatives to GitHub
| Platform | Notes |
|---|---|
| GitLab | Self-hosting possible, integrated CI/CD |
| Bitbucket | Atlassian ecosystem integration |
| Codeberg | Non-profit, community-driven |
| SourceHut | Minimalist, email-driven workflow |
All of these use git under the hood, so your skills transfer directly.
- GitHub Pages publishes a website directly from your repository.
- Tags mark specific commits; releases add notes and downloadable archives.
- Zenodo can archive GitHub releases and assign DOIs for academic citation.
- GitHub Actions automate tasks (testing, building, checking) triggered by repository events.
- A workflow is a YAML file in
.github/workflows/that defines automated jobs.